

During the book production process, edits will be made from typeset first pages to the final printed book, with most people opting to make and transmit these edits using Adobe Acrobat Comments. Acrobat’s Comment feature is something we, at Bookmobile Design & Digital, love using. It makes the alteration process streamlined, efficient for both parties, and lessens the room for error as edits are clearer.
How does it work? Simply, users add edits directly into the PDF we send them for review. When they’re done marking it up with their changes (using Acrobat’s Comment feature), they save the file, attach it to an email, and send it back to us. We are then able to import these edits straight into our design software. With just the click of a button, we can accept and implement the edits seamlessly and quickly.
Jump to the Tool How-To Section
The one major consideration, however, is the editor’s and author’s ability to use the Acrobat Comment feature well. If an editor or author doesn’t add their edits in a way that complements the comment import feature, we’ll need to input the edits manually, increasing the chance for error and time it takes to input the corrections.
So, if you have a book project that’s in need of edits and alterations, read on to learn about the best practices for adding edits to the PDF, along with the best tools to get the job done. To get started, you’ll need to download the free version of Adobe Acrobat Reader. Click here.
Best Practices
First, a few notes on best practices when adding edits using the Comment feature. Following these general rules will make your edits clear and easy for us to import into our design software.
- IMPORTANT: Be sure you’re using the most up-to-date version of Adobe Acrobat, otherwise the import into our design software may fail.
- It’s generally not necessary to write your edit out if it’s relating to punctuation. For example, don’t write [add comma] where you want to add a comma. It’s better to just add a [,] in the edit and move on. Once imported into InDesign, we will accept the edit and the comma will be automatically added to the file.
- A similar point: Don’t signify new text in any way—double quotes, single quotes, italic, or anything else. If you want to add a brand new paragraph, write the paragraph exactly as you want it to look once added to the page and move on.
- You can add some formatting to PDF comments. Rather than writing [italicize] or [bold] in the comment, actually make the words italic or bold in the comment.
- If you’re adding text before or after existing text, remember to add that additional space that’s needed to keep the new word distinct from the existing word. If you don’t, there’s a chance the additional word will run-in with the next word, and this may introduce a new error.
- Try to be as precise as possible when removing, inserting, or replacing text. If you pick up extraneous characters not meant to be in the edit, the edit won’t be implemented as you meant it to be and this could introduce more errors.
These are just best practices. If your comments aren’t absolutely perfect per these guidelines, don’t sweat it. We can usually still import the edits and carefully watch each edit to make sure it’s accurately entered.
The Main Tools
Before getting to the main tools, let’s explain the setup.
- Make sure you have Adobe Acrobat Reader DC downloaded. Click here if you haven’t already done so. Acrobat Reader is free and works to add comments. If you already have Acrobat Pro, you can use that as well.
- Once you’ve downloaded the software, open up the file you need to review in Acrobat.
- On the far right side of the application, there is a long, vertical toolbar (see the screenshot below). The yellow speech balloon is the Comment feature. Click that.
- When you do so, the Comment feature and its tools will launch.

Once the Comment Toolbar is launched, the three most important tools for editing are the Strikethrough Text Tool, Replace Text Tool, and Insert Text Tool (the highlighted three in the screenshot below). These are the three tools you will use the most to add edits to the text.

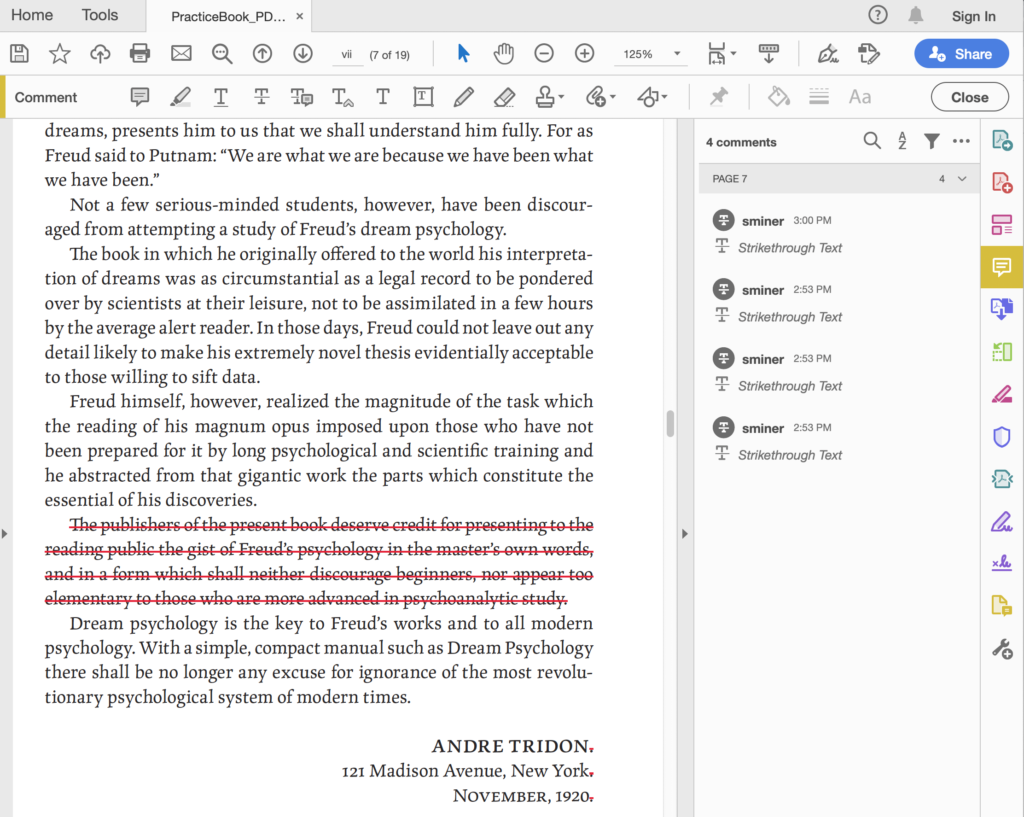
Strikethrough Text Tool

The Strikethrough Text Tool removes existing text in the file. This tool can be used to remove punctuation or entire paragraphs.
- Run your cursor over the text you’d like to remove.
- Click the Strikethrough Text Tool from the Comment Toolbar.
- You’ll then see a red line run through the text, indicating it should be removed. You will also see an edit pop up in the Comment Sidebar stating the Strikethrough Text Tool was used.
- Move on to the next edit.
Replace Text Tool

The Replace Text Tool allows you to remove and insert text simultaneously. It can be used for edits large or small.
- Select the text you want to replace.
- Click the Replace Text Tool from the Comment Toolbar.
- A comment will pop up in the Comment Sidebar. Add the new text in the comment exactly as you want it to appear. You MUST add text here, otherwise the edit won’t work.
- Click “Post.”
- Move on to the next edit.
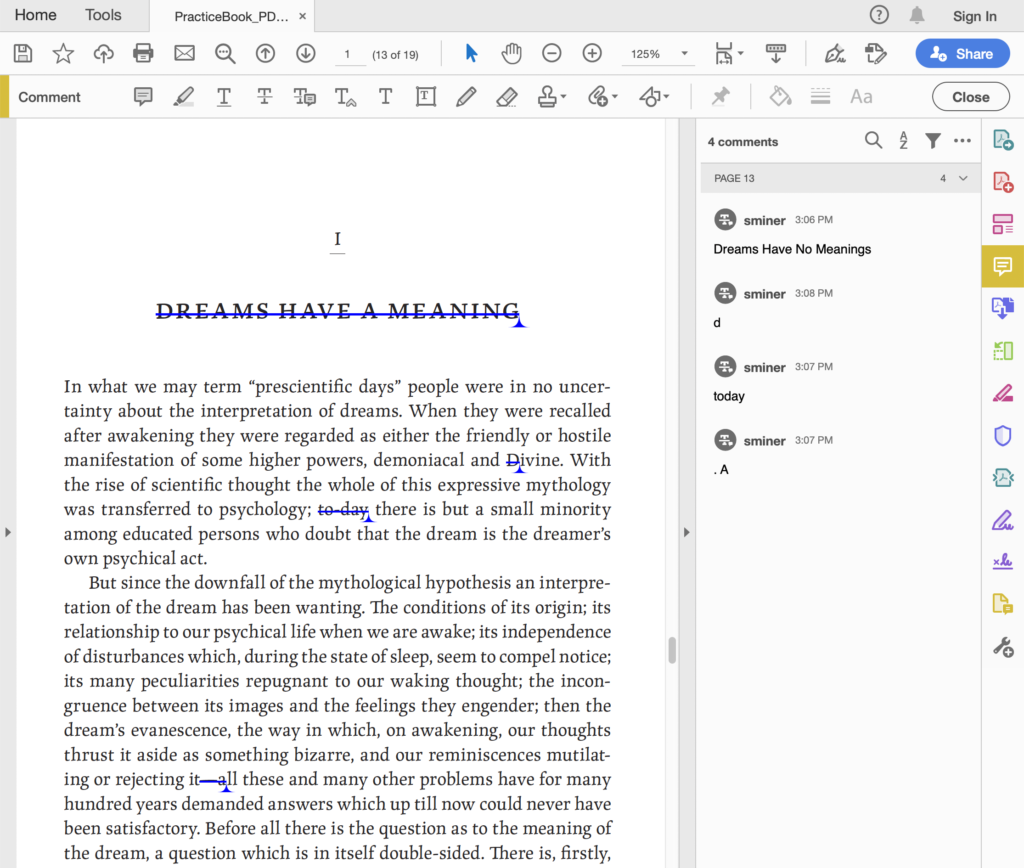
Insert Text Tool

The Insert Text Tool allows you to add additional text to the file. This could be something as small as a comma, or as large as a whole paragraph.
- Click the spot in the text you’d like to add the additional text.
- Click the Insert Text Tool from the Comment Toolbar.
- A comment will pop up in the Comment Sidebar. Add the new text in the comment exactly as you want it to appear. You MUST add text here, otherwise the edit won’t work.
- Click “Post.”
- Move on to the next edit.

The Supplementary Tools
Beyond the main tools, there are two other helpful tools when adding edits. These are the Sticky Note Tool and Highlight Text Tool. As compared to the three main tools, these ones should be used sparingly for questions, to explain more complex changes, or when the three main tools can’t do the job succinctly.
The supplementary tools for editing are highlighted below in the Comment Toolbar. In order from left to right is the Sticky Note Tool and Highlight Text Tool.

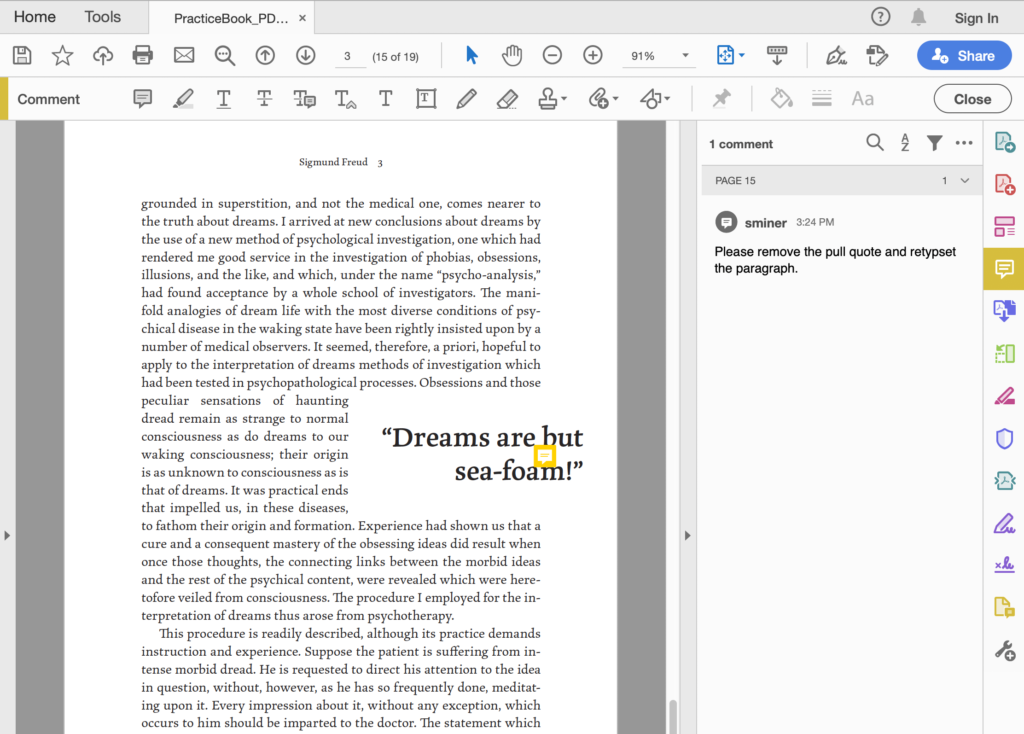
Sticky Note Tool

The Sticky Note Tool is great for complex formatting changes that are better described in a note or for addressing issues with images (their placement, color, size, etc.).
- Click the Sticky Note Tool.
- Click in the spot on the page you want to add your note. Usually this would be near the edit in question.
- Write your comment in the Comment Sidebar and click “Post.”
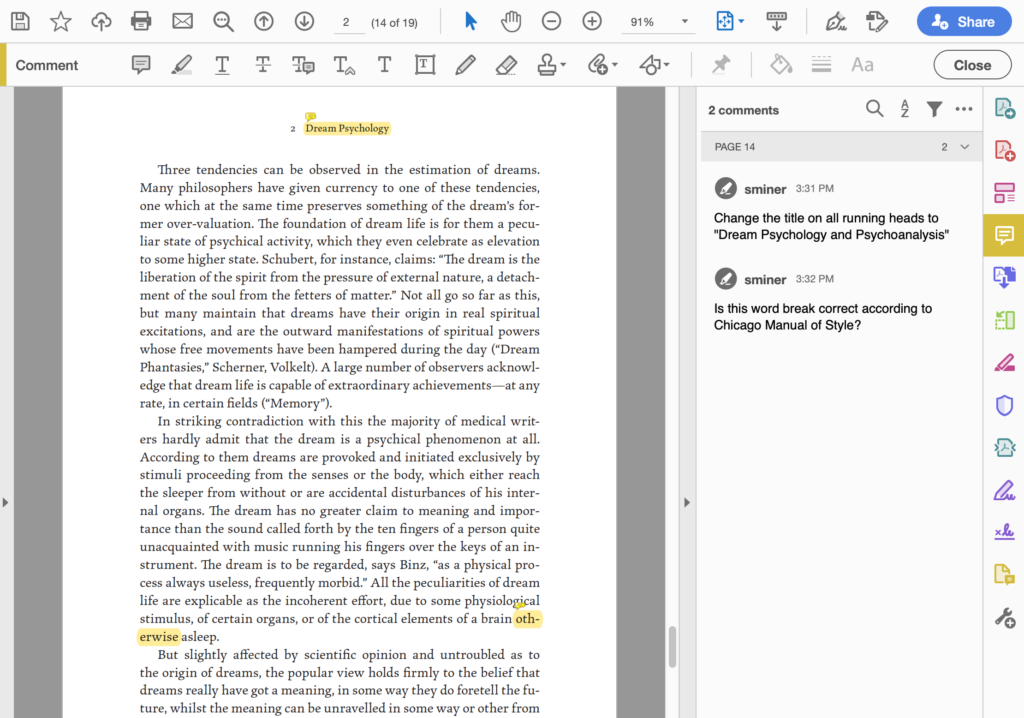
Highlight Text Tool

The Highlight Text Tool is ideal for queries to your typesetter that relate to specific parts of the text. It can also be used for specific character formatting that isn’t compatible in a PDF comment—like strikethroughs, small caps, underlining, and the like.
- Select the text you’d like to highlight.
- Click the Highlight Text tool.
- Write your question or comment in the Comment Sidebar and click “Post.”
Summary
Using Adobe Acrobat Comments is a fantastic way to transmit edits to your typesetter.
They save time.
They save money.
They increase accuracy.
They make understanding edits easier.
They are easier to manage, organize, and adjust later on.
Bookmark this how-to guide for the next time you want to use this helpful feature during one of your book projects!